On The Horizon
- Tia

- Aug 17, 2023
- 3 min read
Tia's Tips: If you've never heard of or used the 'Press-n-Seal' method for your intricate dies-stayed tuned for step-by-step details. Or do a YouTube search! This is the way to go if you've got lots of pieces in your die to get glued down!
Riley and Company-Design Team Card Challenge

Riley and Company
Funny Bones-A Glow Beyond the horizon
Cut-Ups-Sunburst Background
Stamps-Dress Up Cows & Dress Up Farmer Set
Welcome friends! It looks like many of our Riley and Company friends and fans enjoyed last month's design team's card challenge that we are going to keep it up every month-at least until the end of the year!
So here we go! This month's theme is: Birthdays! What a great theme! And definitely a card we can never have enough of in our card stash.
I had just finished up my cards for our new release later this month and had sitting on my desk the adorable: Dress Up Cow. I had to make a card with him! (A million years ago, I had a cow kitchen! So, I'm a FAN!)
I basically have most of the Riley and Company collection memorized! I just still need them all-LOL. I knew instantly the Funny Bone sentiment I wanted and got it ordered.

This layout idea came to me and turned out pretty much as I saw it in my head.
Now, I will admit, COPICS are my ink of choice. I don't do a lot of brush inking onto my cards-so I forgot the golden rule that yellow and purple make-BROWN so my horizon got a little muddy. But overall, I'm still really happy with all the layers that happened here!
I could not have made this card without using the 'Press-n-Seal' technique!

If you have never seen or heard of this technique-you can search YouTube and find some videos, but I will do my best to show you what I did.
This is a great technique when you have a die with a lot of separate pieces-like the Sunburst die I used.
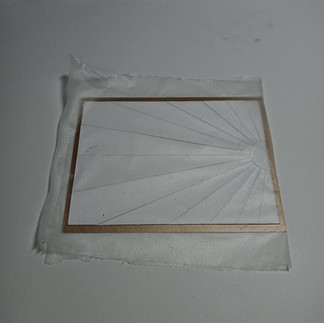
Tear a sheet as wide as your die and use half of it to cover the front (non-cutting side) of it AFTER you have taped whatever cardstock you want to die cut on the bottom (cutting side). 1st photo (L to R).
Run this thru your die cut machine (electric or hand crank). 2nd photo: When it comes out seal the open end with the extra press-n-seal and press the non-cut side down into the cut side-so you can remove the die. Slowly open the front (non-cut side) and remove your die. 3rd photo: Your cut pieces should be sticking to the press and seal!
Now you can ink here or adhere it to your paper/card. I inked here so if something went wrong-it wasn't adhered to my card base.
Photos & steps L-R:
1st photo-Here is where I inked up my background and you can see it's still attached to the press-n-seal.
Next I sealed both sides .
I opened the back side-peel the press-n-seal SLOWLY or your pieces may get pulled up. I then used liquid glue and pressed my background cardstock to it.
Flipped it over and removed the Press-n-seal completely. By using liquid glue (like Riley's Zip Dry) you have a bit of time to move any pieces that moved out of place.
I cut out my sunburst horizon with a rectangular slimline die and adhered to my slimline card base.
I created my layered fields using a background die from Whimsey stamps. I gathered green cardstock in different shades and cut them all together. Then I flipped, reversed and layered them for my farm fields. Again I used my slimline die to cut them out and adhere right at the base of my sunburst.

I used the Dress Up Farmer Set. There are so many cute outfits you can choose from! I was kinda cracking up over my plain-Jane cow stealing the tractor late at night!
And of course-to make this card complete, the Funny Bones!!!

I had so much fun making this card! I hope you enjoyed it as well and will head over to the Riley & Company Fan Book Page on Facebook. Join us next month for another Design Team Challenge Card!
I would SO love for you to be apart of RockyMtnCraftia as well! Please scroll to the bottom of the page and sign up to follow me!
You will also find me on:
Instagram: #rockymtncraftia
and on Facebook: Tia Boswell
Until next time, Go-Get-Crafty!
-Tia


Comments